
Hi everyone! I hope you’re all having a great week 🙂 I’m excited to share my second hair tutorial post featuring the Conair Quick Twist! If you haven’t heard of the Quick Twist, it’s a really easy-to-use, battery-powered tool that effortlessly creates perfect rope braids for all hair types in just seconds. Follow along below for the step by step instructions on how to achieve this twisted rope braid wrapped bun!

What you’ll need:
Small rubber hair elastics
Hair ties
A bun maker
Hair pins & bobby pins
A hair smoother & teaser (or a toothbrush instead!)
A hair brush
& of course, your Conair Quick Twist!

+ Tie your hair up in a high ponytail wherever you want your bun to be.
+ Separate a 2 inch chunk of hair to be twisted! I used a claw clip to hold the rest of my hair away to one side.
+ Brush out that section so that it’s nice and smooth.
+ Split that section into two pieces.
+ Clip those sections into your Conair Quick Twist!

+ Remember to hold your Conair Quick Twist nice and taut (extended & tight) and not lax or loose otherwise your rope braid won’t twist correctly!
+ When you’re ready, turn on your Quick Twist and let it do its thing until you’ve reached your desired twist tightness (a few seconds).
+ Then, manually rotate your Quick Twist towards the right (follow the arrow on the side) to complete your rope braid!
+ Pinch the end of your braid and release it from the Quick Twist.
+ Secure your rope braid with a small rubber hair elastic.
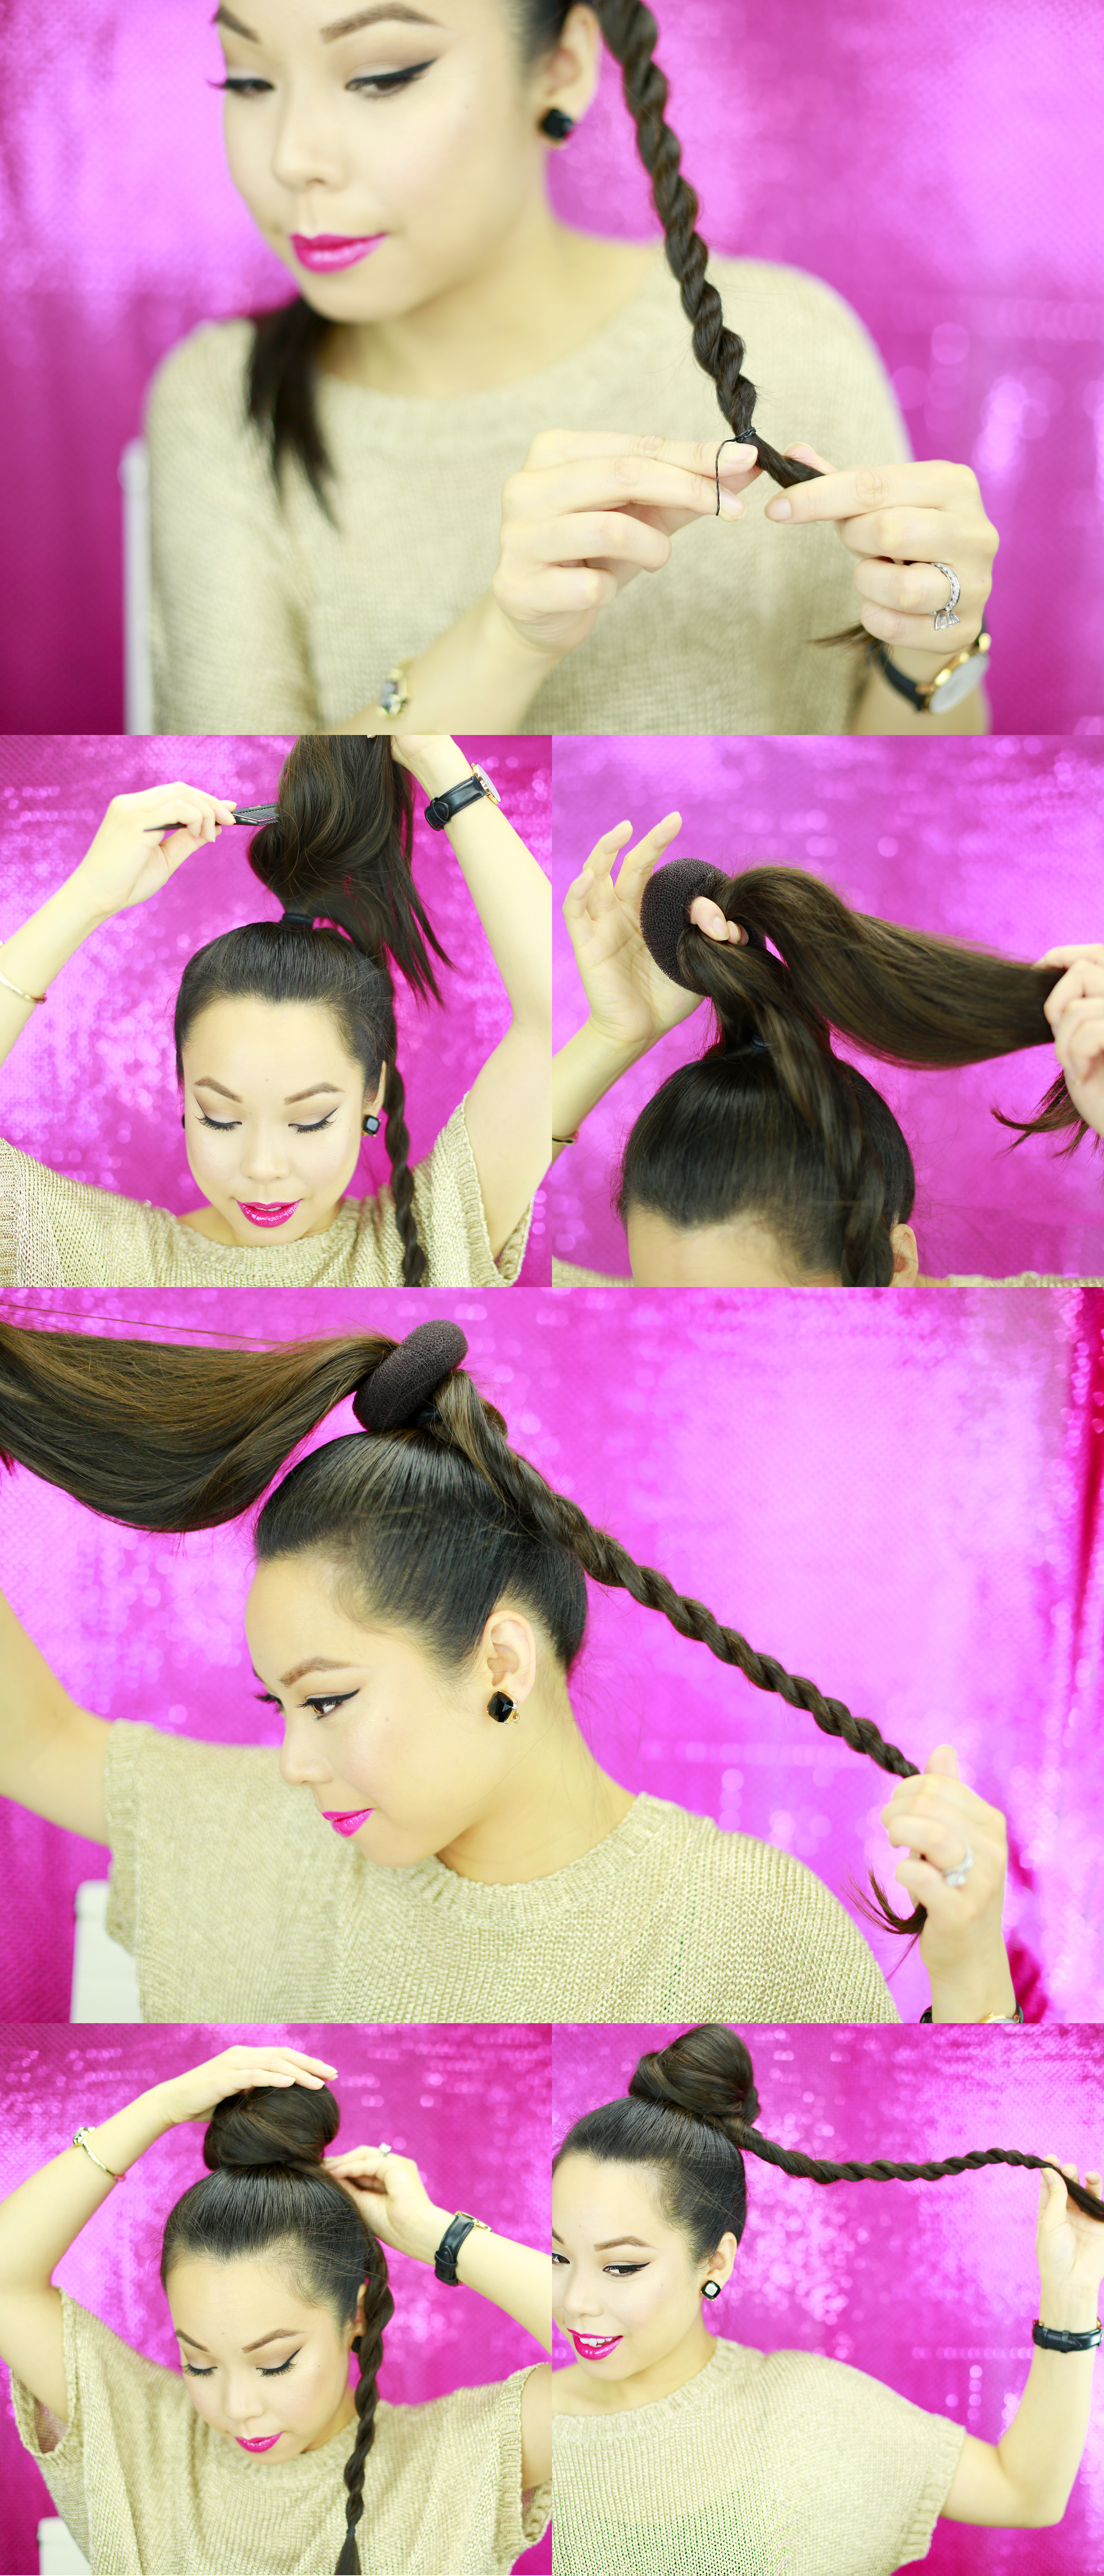
+ Make sure your rope braid is secured.
+ Take the remainder of your ponytail and lightly tease it for volume.
+ Loop only the remaining unbraided section of your hair through a bun maker.
+ Make sure your rope braid is still outside of it!
+ Wrap your teased hair around the bun maker for a messy effortless bun look & pin it in place using bobby pins & hair pins!
+ Your rope braid should still be left outside of it like this funny tail! 🙂

+ Take your rope braid and wrap it around the base of your bun.
+ Take care to keep it loose so that it doesn’t get hidden underneath!
+ Pin it in place using bobby pins and hair pins.
+ Smooth out any bumps and flyaways with a smoothing brush or a toothbrush.
+ And of course, check yourself out! 😉
Photos by Chris Dyer.
If you haven’t seen it yet, check out my previous tutorial here to watch a video sharing how to get a rope braided side-do with the Conair Quick Twist!
Xox,
An Dyer
Instagram | Bloglovin’ | Twitter | Facebook
Shop this post & get the look:

Disclosure: Compensation for this post was provided by Conair. While I was compensated to write this post, all opinions are my own. Thank you for supporting HautePinkPretty.com sponsors as they help make my blog possible!


1 Comment
Gorgeous hair!!! That tool looks pretty cool!
December 31, 2015 at 4:31 pm